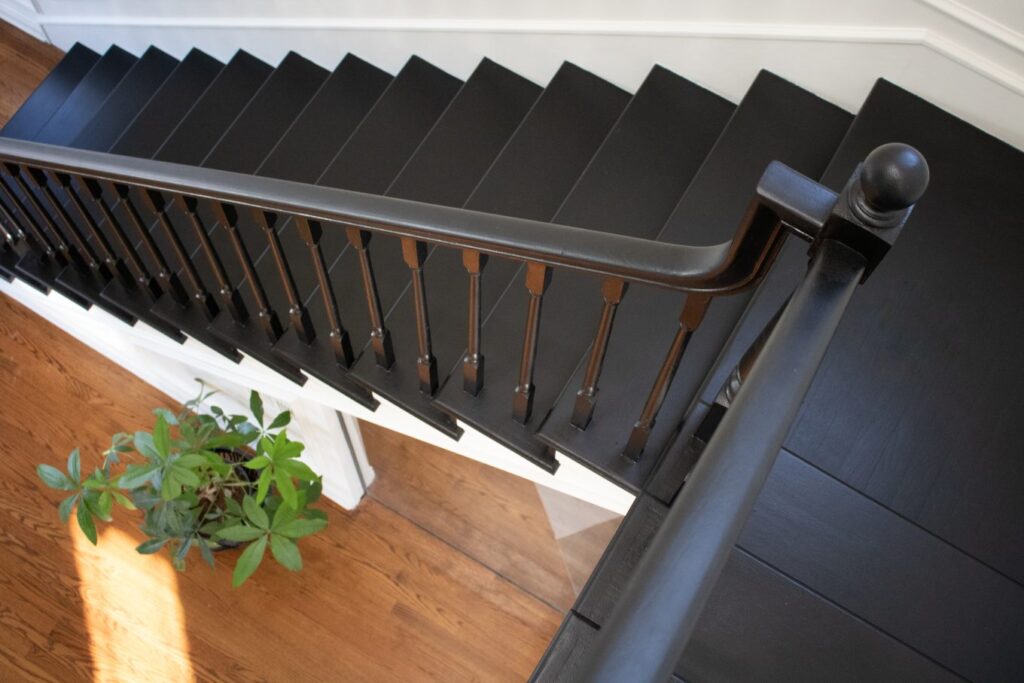
After almost 2 years of debating what I wanted to do with my outdated stairs, last week I finally decided to knock out my staircase makeover.
Honestly, it was one of the easier projects I’ve done so far. I was able to complete the makeover in 4 days. 1 day to apply 3 coats of primer and then one day for each coat of black enamel paint.
Before
This is what the staircase—and downstairs area—looked like on closing day (Feb ’22). All of the walls were a shade of tan, brown, orange or red and the stairs were quite outdated in tone.
I’ve gone back and forth trying to figure out what approach I wanted to take to make them feel more modern, but I didn’t want to rush the decision. So I took my time and lived with them the way they were.
But there’s patience and there’s procrastination. I was definitely leaning pretty far into the procrastination camp and I decided it was time to get moving on this makeover.
Supplies Needed:
Step 1: Sanding & Degreasing
I’d already previously painted the spindles over the holiday break. I knew I wanted them black but I still wasn’t quite decided on what I wanted to do with the actual stairs. But I needed a little bit of motivation to get started on the project so I started with the spindles. After living with the black spindles for a few weeks I decided to just go ahead and paint the entire staircase black. But first I had to prep them.
I started by using a degreaser to remove the top layer of the stain sealant. Then I used my electric sander with 120 grit sand paper to sand the entire staircase. After I sanded, I cleaned the stairs and then used a second degreaser. That was really the most time consuming part. But it was absolutely necessary in order to make sure the paint properly adhered.
Step 2: Priming
After all the sanding and prep work, I started priming. I applied 3 coats of Stix Bonding Primer—allowing about 4 hours of drying time between each coat. In fact, for the very last coat, I waited until just before I headed to bed in order to allow extra time for the second coat to dry and then allow the 3rd coat to dry overnight.
The first coat of primer was pretty janky and scary looking. But even still, it was at this point that I could start to see that the black staircase was going to be a massive improvement. Admittedly it was hard for me to see the full vision with the old outdated stairs and I was quite skeptical. But once the primer was on, I was fully committed and onboard! I mean… I kind of had to be, right?
After the second and third coat of primer, things really started to take shape.
Step 3: Painting
For the actual paint, I used Behr’s Urethane Alkyd Enamel in a semi-gloss finish. The semi-gloss finish gives it the perfect amount of shine and makes them super easy to clean.
This is what it looked like after the first coat of paint. From this side angle it doesn’t look too bad. But from the front—just like with the first coat of primer—it was pretty scary. With every paint project there’s that moment after the first coat of paint where you really start to regret your decision. It always looks awful! But stay the course. It always gets worse before it gets better.

Pro Tip: Keep a wet wash cloth nearby to quickly clean up any drips or splatter. But don’t panic! If you miss any spots, let it dry and then scratch it up or use a latex paint cleaner. It will come right up!
After

I still have another set of stairs leading down in the basement to complete, but for now… get a load of the front stairs!
I’m sure you noticed the upstairs floors don’t match the downstairs. I had the upstairs refinished during my closet renovation, but I held off on having the downstairs done at the same time. When you refinish hardwood floors you have to move everything out of the house and doing one level at a time allowed me to just move everything downstairs and still live in the (albeit messy) downstairs area. I’m also planning to renovate my kitchen and change the layout at some point and it’s best to redo the floors during that project. So for now we have mix-match floors. But that’s ok! Turning a house into a home is a marathon not a sprint.
In the meantime, I’m on the hunt for the perfect runner and also mapping out a gallery wall for the landing area. Here are a few of the runners I either considered or just love in general.
Shop Runners I Love:
“You don’t have to see the whole staircase, just take the first step.” — Dr. Martin Luther King, Jr.


